Upgrading your home’s climate control system is a rewarding project, and learning how to install a thermostat is the perfect place to start.
Whether you are dealing with a faulty older model or upgrading to a modern smart home system, this process is simpler than you might think.
If your heating or cooling system is acting up, a new unit is often the most reliable solution. As a certified HVAC technician with over a decade of field experience, I guide homeowners through this process daily.
A thermostat acts as the brain of your home’s HVAC system, telling your furnace and air conditioner exactly when to turn on and off. I understand that dealing with electrical wires can feel intimidating, but with the right instructions, it is highly manageable.
Proper installation matters because a poorly wired unit can lead to short-cycling, blown fuses, or even a damaged furnace control board. Taking the time to understand your specific system requirements ensures your equipment runs efficiently and safely.
While many people assume they need an expensive professional, most basic residential setups are perfectly suited for DIYers. In this comprehensive guide, I will walk you through everything from basic wall units to automotive replacements, getting your systems running perfectly.
Can I Install a Thermostat Myself?
Many homeowners ask me, “Can I install a thermostat myself?” The answer is almost always a resounding yes. Modern manufacturers design these devices specifically with the average homeowner in mind.
Most standard installations do not require advanced electrical knowledge or specialized commercial tools. If you can use a screwdriver, read basic labels, and follow simple safety instructions, you can successfully complete this project.
Typically, the time required ranges from 20 to 60 minutes, depending on the complexity of your wiring. The skill level is generally considered easy to medium, making it an ideal weekend project for beginners.
How to Install a Thermostat: Is It Hard?
People often wonder, “How hard is it to install a thermostat compared to other home repairs?” It is usually much easier than installing a ceiling fan or replacing a light fixture. The wires you are dealing with are low-voltage (usually 24V), which significantly reduces the risk of serious electrical shock.
However, if you are asking how hard it is to install a new thermostat when moving from an old mechanical dial to a smart device, there is a slight learning curve. The main challenge is identifying your existing wires and ensuring they match the new baseplate.
If you are specifically wondering how hard it is to install a smart thermostat, the answer depends on your “C-wire” (common wire). Smart devices require constant power, and if your older home lacks this specific wire, the installation becomes slightly more complex, though still achievable with a provided adapter.
Types of Thermostats Explained
Choosing the right device is the first step toward a successful installation. Understanding the differences between models ensures you select the best fit for your lifestyle and HVAC setup.
How to Install a Thermostat: Manual Models
These are the traditional, mechanical models featuring a simple dial or slider. If you are learning how to install manual thermostat units, the process is incredibly straightforward. They rarely require a common wire and use basic mercury or bi-metal coils to read the room temperature. While reliable, they lack energy-saving scheduling features.
How to Install a Thermostat: Digital Models
Digital models bridge the gap between mechanical dials and modern smart homes. If you want to know how to install a digital thermostat, the wiring is very similar to that of a manual unit but features an LCD screen for precise temperature reading. They are powered by internal batteries or the HVAC system, offering better accuracy without complex networking.
How to Install a Thermostat: Programmable Models
These units allow you to set daily or weekly temperature schedules. When mastering how to install a programmable thermostat, you follow the same basic wiring steps as a digital unit. The process of installing a programmable thermostat is popular for homeowners looking to save on energy bills while at work. Proper installation of programmable thermostat bases ensures the internal clock and memory function without interruption.
How to Install a Thermostat: Smart Models
Smart devices connect to your home Wi-Fi, allowing you to control the climate from your smartphone. Learning how to install a smart thermostat requires paying close attention to the C-wire for constant power. Installing a smart thermostat also involves downloading a manufacturer’s app and syncing the device to your home network for remote access.
How to Install a Thermostat: Honeywell Units
Honeywell is one of the most trusted brands in the industry. Knowing how to install a Honeywell thermostat model is a universal skill, as they produce everything from basic dials to Wi-Fi units. Whether you are researching how to install a Honeywell thermostat or figuring out how to install a Honeywell home thermostat, their standardized color-coding makes the process highly intuitive.
Nest Thermostats
Google’s Nest Thermostat is a premium smart device known for its sleek design and learning algorithms. Installing a Nest requires a compatible backplate and often utilizes a streamlined app-based setup guide. They are engineered to be highly user-friendly for DIY installers.
Tools Needed for How to Install a Thermostat
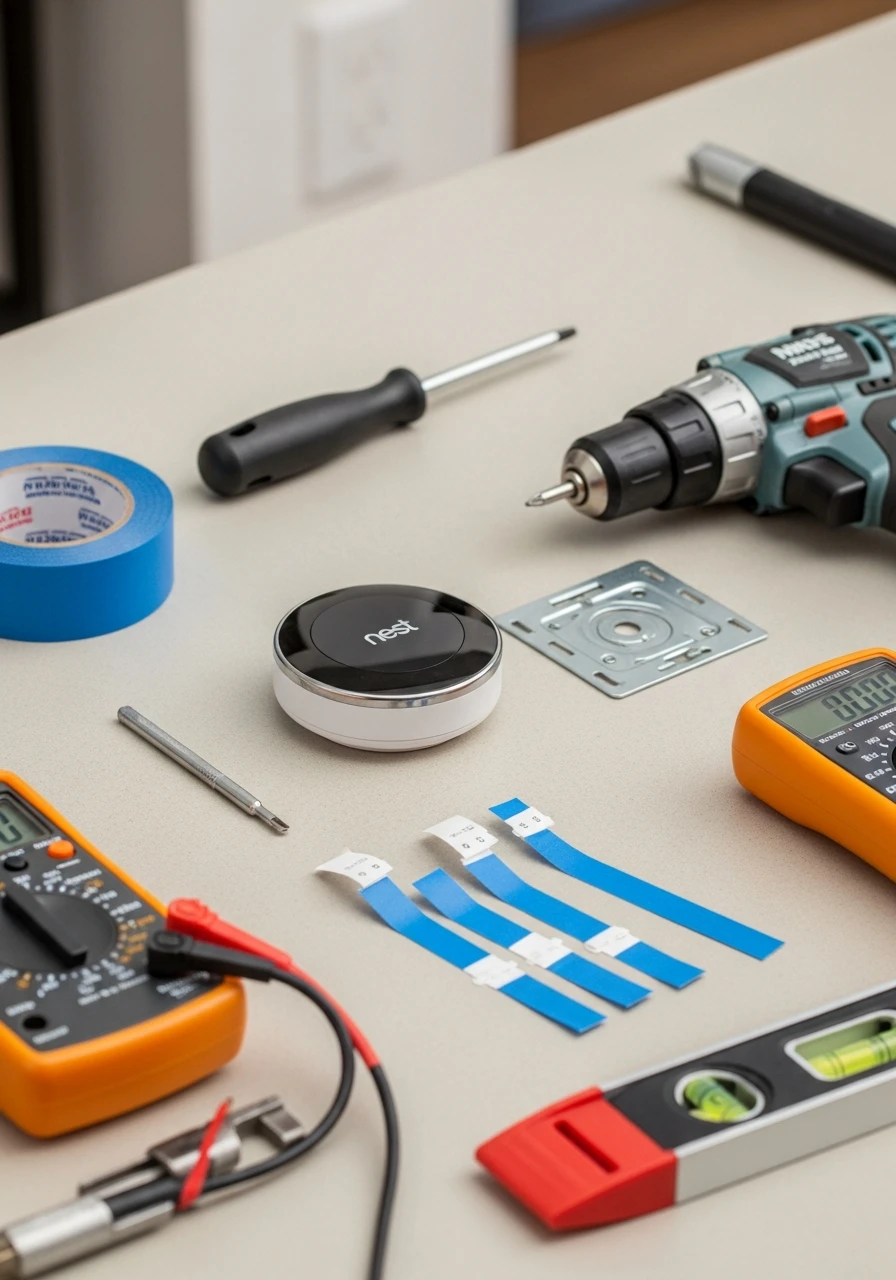
Before you begin, gather your supplies to ensure a smooth, uninterrupted workflow. Having the right tools prevents frustration and potential damage to the device.
Small flathead and Phillips screwdrivers: For removing the old base and attaching wires.
Power drill: If you need to mount the new baseplate in a different location.
Wire labels or masking tape: Crucial for marking wires before disconnecting them.
Multimeter or voltage tester: To verify that the power is completely off.
Level: To ensure your new digital display sits perfectly straight on the wall.
Step-by-Step: How to Install a Thermostat in a House
If you are ready to learn how to install a thermostat in a house, follow these precise steps. This guide works whether you are wondering how to install a home thermostat or how to install a thermostat in your home for the first time.
Step 1 – Turn Off Power
Safety is always the number one priority. Locate your home’s main electrical breaker box and turn off the switches that power your furnace and air conditioning unit. Use your voltage tester on the existing thermostat to confirm the screen is blank and no power is flowing.
Step 2 – Remove Old Thermostat
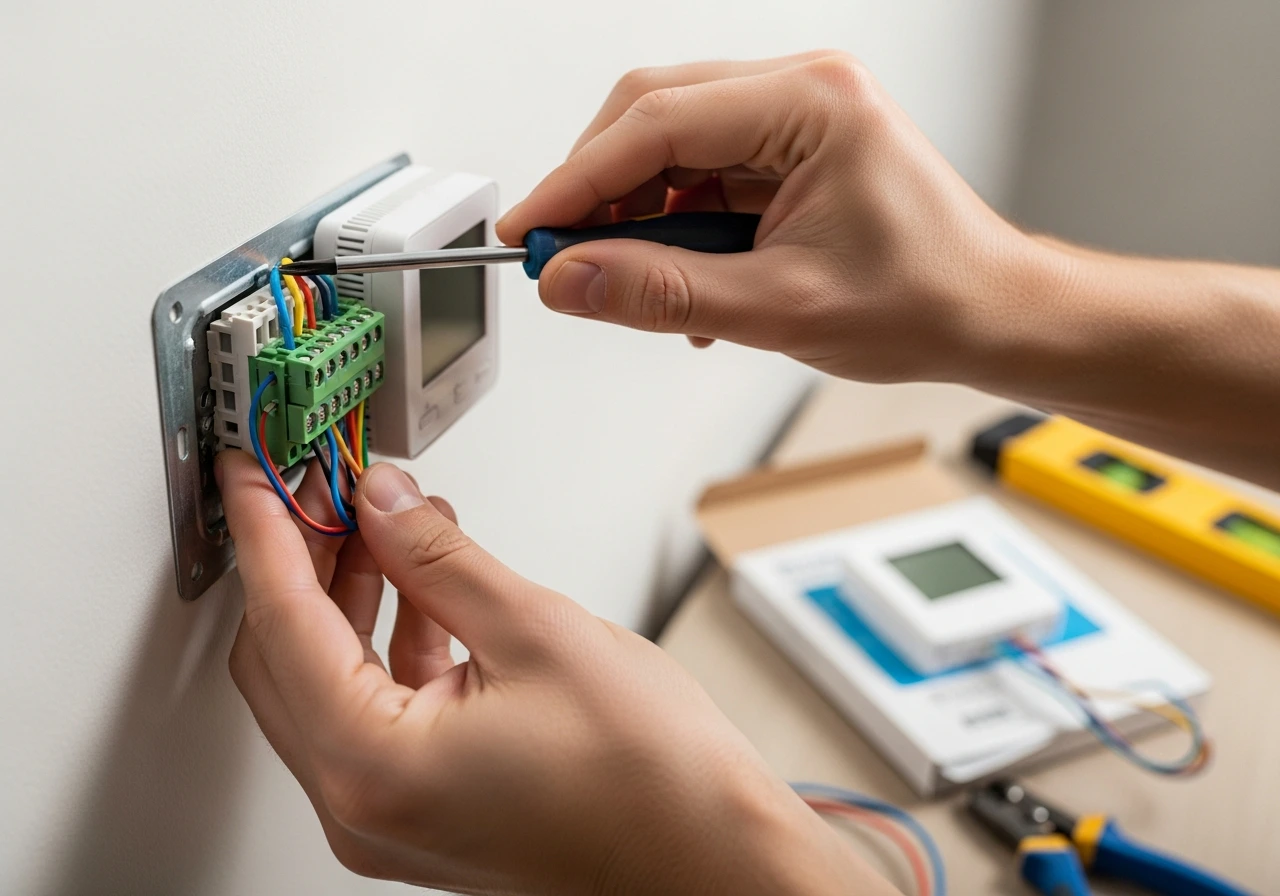
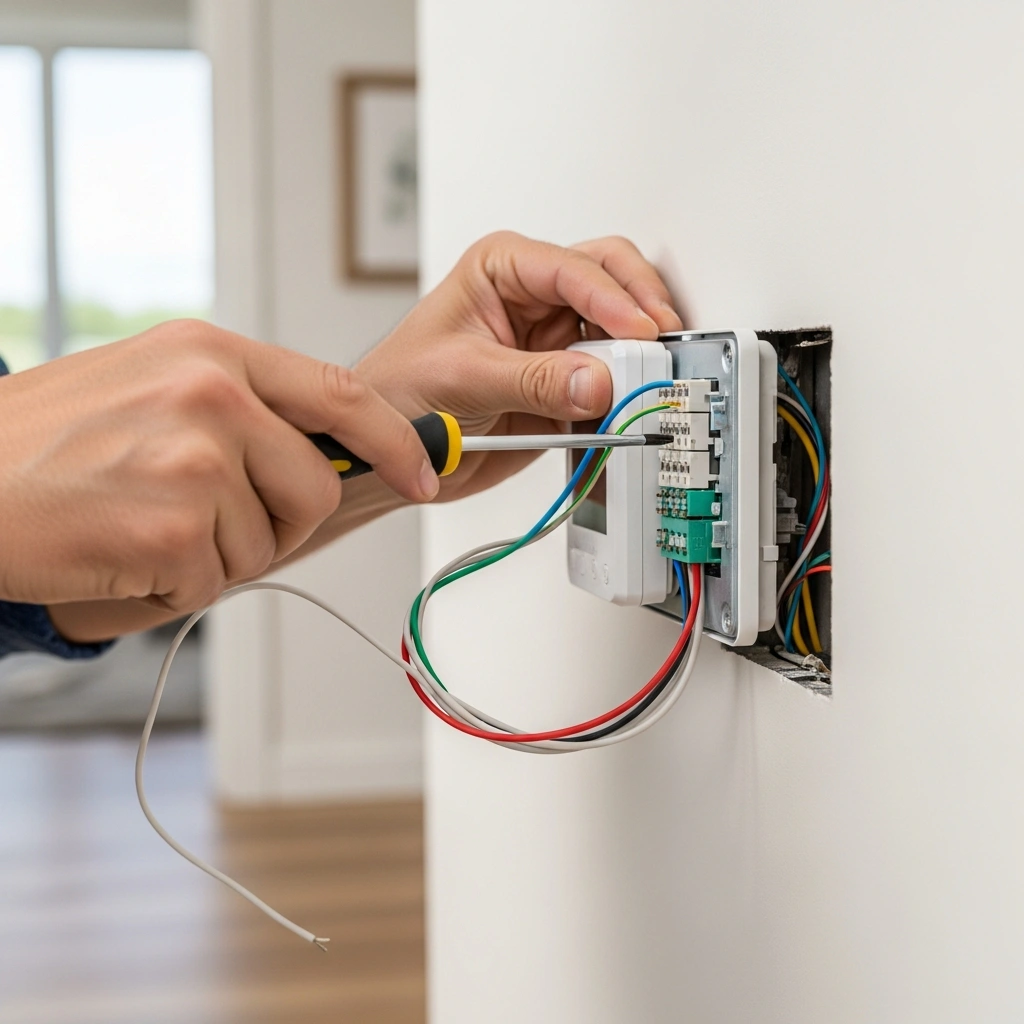
Gently pull the faceplate of your old unit off the wall. This will expose the baseplate and the wiring. If you are trying to replace an old thermostat with a digital model, be careful not to let the exposed wires fall back into the wall cavity once disconnected.
Step 3 – Label Wires
This is the most critical step. Do not rely on wire colors; rely on the terminal letters they are connected to (R, W, Y, G, and C). Use your masking tape or provided wire labels to tag each wire with its corresponding letter before loosening the screws. Take a clear picture with your smartphone for reference.
Step 4 – Install New Thermostat Base
Unscrew the old baseplate and remove it. Take your new baseplate, thread the labeled wires through the center hole, and use a level to ensure it is straight. Mark the screw holes, drill pilot holes if necessary, and secure the new baseplate to the wall. This completes the how to install a thermostat on the wall phase.
Step 5 – Connect Wiring
Now it is time for the wiring. How to install thermostat wiring correctly depends entirely on your labels. Match the labeled wires to the corresponding terminal letters on the new baseplate and tighten the screws.
If you are researching how to install a thermostat with 2 wires, you likely have a heat-only system (usually an R and W wire). The process of how to install a thermostat with only 2 wires or how to install a digital thermostat with 2 wires is simple: connect the red wire to R (or Rh) and the white wire to W.
Step 6 – Attach Display & Power On
Once all wires are secure and tucked neatly into the wall, snap the new digital display onto the baseplate. Return to your breaker box and turn the power back on. Follow the on-screen prompts to configure your system settings.
How to Install a Thermostat for Central Heating
Central heating systems, which push warm air through ducts, require specific wiring to control the blower fan. When learning how to install a thermostat for central heating, you must pay attention to the “G” wire.
The G wire controls the fan relay. Ensure this wire is securely fastened to the G terminal on your new baseplate. Without it, your furnace might generate heat, but the blower will not distribute it throughout the house.
If your central system includes both heating and cooling, make sure the factory-installed jumper wire between Rh (heating power) and Rc (cooling power) remains in place, unless your manual states otherwise.
How to Install a Thermostat on a Boiler
Boilers utilize hot water or steam rather than forced air, which changes the wiring dynamic. Knowing how to install a thermostat on a boiler means recognizing that you are dealing with a radiant heating system.
Boiler systems frequently only use two wires (R and W) because there is no blower fan to control. When wiring, you simply connect the power wire to Rh and the heat call wire to W.
Be sure to access the settings on your new digital or smart thermostat and specify that your heating type is “radiant” or “boiler.” This adjusts the internal algorithms so the system does not short-cycle the boiler pump.
How to Install a Thermostat: Smart Home Setup
Upgrading to a Wi-Fi-enabled device adds immense convenience. If you are exploring how to install a smart thermostat, the physical mounting process is identical to that of a digital unit.
The key difference in the smart thermostat process is power management. Smart devices have bright screens and Wi-Fi chips that require constant 24V power, which is supplied by the “C” (Common) wire.
If you want to know how to install a smart thermostat with only 2 wires, you have a hurdle. You will need to either run a new C-wire through the walls or use a “C-wire power adapter” kit, which many premium smart thermostats include in the box.
How to Install a Thermostat: Honeywell Brands
Honeywell units are incredibly user-friendly and widely compatible. If you are looking up how to install a Honeywell thermostat model, start by reading their included quick-start guide, as their terminal layouts are highly standardized.
The process of installing a Honeywell thermostat involves utilizing their UWP (Universal Wall Plate) system on newer models. This plate makes changing a thermostat in a Honeywell house system incredibly easy, as the faceplates just click in and out.
If you need to know how to install a Honeywell thermostat heat-only system, simply connect the R and W wires to their respective terminals, leaving the Y and G terminals completely empty.
How to Install a Thermostat in a Car
While I primarily work on homes, mechanical engine components share similar logic. Knowing how to install a thermostat in a car is vital for preventing engine overheating and ensuring your heater works in the winter.
The automotive thermostat is a mechanical valve that regulates the flow of coolant between the engine and the radiator. The process of how to install a thermostat on a car or how to install a thermostat in car engines requires basic mechanical tools and a drain pan.
Step 1: Drain Coolant
Locate the radiator petcock (drain plug) at the bottom of your radiator. Place a drain pan underneath and let enough coolant out so the level drops below the thermostat housing.
Step 2: Remove Housing
Follow the upper radiator hose to where it connects to the engine block; this is the thermostat housing. Remove the two or three bolts holding the housing in place and lift it off.
Step 3: Replace Thermostat
Take note of how the old unit is seated (usually the spring side faces down into the engine). Remove the old unit, clean the mating surfaces thoroughly, and drop the new thermostat in, along with a new gasket.
Step 4: Reassemble
Bolt the housing back in place, being careful not to overtighten and crack the metal. Refill the radiator with the saved coolant, start the engine, and let it run to bleed any trapped air from the system.
Example: Chevy S10 Installation
If you are specifically wondering how to install a thermostat on a Chevy S10, the process is classic. The housing is right at the front top of the intake manifold. Use a 13mm socket to remove the housing, scrape off the old paper gasket, and ensure the new thermostat is seated perfectly in the groove before tightening.
How to Install a Thermostat on Special Systems
Not all heating systems are standard central air. Outbuildings, fireplaces, and alternative heaters require specific, low-voltage, or millivolt controllers.
Gas Fireplace Thermostat
If you want to know how to install a thermostat on a gas fireplace, you must ensure the thermostat is “millivolt compatible.” Standard 24V thermostats will not work. Connect the two millivolt wires from the fireplace valve to the R and W terminals.
Gas Wall Heater Thermostat
Similar to a fireplace, knowing how to install a thermostat on a gas wall heater often involves millivolt systems. Run the two-wire strand from the wall heater’s gas valve directly to a basic, battery-powered digital thermostat.
Garage Heater Thermostat
When learning how to install a thermostat on a garage heater, location is key. Mount the unit away from drafts or direct blasts from the heater itself. Connect the two low-voltage wires to the R and W terminals on a heavy-duty, dust-resistant model.
Pellet Stove Thermostat
Figuring out how to install a thermostat on a pellet stove requires checking the stove’s control board. Most modern stoves have a jumper wire on the back that you remove, replacing it with the two wires leading to a standard low-voltage thermostat.
Swamp Cooler Thermostat
Evaporative coolers operate differently from standard AC. Learning how to install a thermostat on a swamp cooler requires a specific line-voltage or evaporative cooler thermostat. These have specific wiring for the water pump (often labeled ‘P’) and a two-speed fan (‘Hi’ and ‘Lo’).
How to Install a Thermostat Upstairs
Zoning a house to have independent climate control on different levels is a great upgrade. Knowing how to install a thermostat upstairs requires integrating it into a zoned HVAC control board.
If the wiring is already in the wall, you simply install the new unit following standard procedures. However, if this is a brand-new zone, you must run new thermostat wire down to the HVAC control panel and install automated dampers in your ductwork.
For complex zoning, I highly recommend using wireless smart thermostats. They can communicate with the main hub downstairs without requiring you to tear open drywall to fish new wires.
Thermostat Compatibility Guide
Before purchasing, verify that the new unit can communicate with your specific HVAC hardware. Mismatched equipment can cause severe electrical damage.
If you are asking, “What thermostat is compatible with Bryant?” Most standard 24V digital and smart thermostats (like Nest or Ecobee) will work, unless you have a proprietary Bryant Evolution communicating system. Communicating systems require the exact manufacturer-branded thermostat.
If you are wondering, “What kind of thermostat for a gas fireplace?” look specifically for models labeled “millivolt system compatible.” Standard smart thermostats require 24V power and will not work on a standalone gas fireplace without a special relay transformer.
How to Install a Thermostat: Cost Breakdown
Budgeting for this project depends heavily on the route you take. Homeowners frequently ask, How much does it cost to install a thermostat?
If you choose the DIY route, you are only paying for the unit itself. The actual installation cost is $0, though you might spend $10 to $50 on tools like a voltage tester or drill bits if you do not already own them.
If you are wondering how much to install a thermostat via a professional, labor typically ranges from $100 to $150 for a standard swap.
When factoring in how much it costs to install a smart thermostat, prices can climb. If a technician needs to run a new C-wire through your walls, the labor cost for installing a smart thermostat can easily reach $200 to $300.
When You Need Professional Installation
While DIY is great, some situations require a licensed professional. If you search “need thermostat installed,” it is usually because you’ve hit a major roadblock.
If you open your wall and find thick, multi-colored wires secured with large wire nuts, you likely have a “line voltage” system (120V or 240V). These are dangerous to work on and require a certified electrician.
You should also call a pro if your HVAC system uses a proprietary “communicating” setup or if you simply cannot get the new device to power on after attempting the installation yourself.
Home Depot Installation Guide
Many homeowners purchase their units from big-box retailers and rely on the Home Depot thermostat installation instructions provided in the aisle.
Home Depot often partners with local contractors via their Pro Referral service. If you buy a unit there, you can scan a QR code on the receipt to have a vetted local professional contact you to handle the wiring.
If using their DIY guides, ensure you match their generic instructions against your specific HVAC manufacturer’s wiring diagram for accuracy.
Troubleshooting Thermostat Installation
Even with the best instructions, minor hiccups can occur. Here are a few common problems and how to solve them.
If your device has no power, double-check that the furnace breaker is turned back on. Also, verify that the furnace door panel is securely closed, as most furnaces have a safety kill switch on the door.
If you have wrong wiring symptoms (e.g., the AC turns on when you call for heat), you likely swapped the W (heating) and Y (cooling) wires. Turn off the power and reverse them.
If your heating is not working, check the device settings. Ensure it is configured for the correct system type (gas/oil vs. electric/heat pump), as electric systems require the thermostat to activate the blower fan differently.
Frequently Asked Questions
Can I install a thermostat myself?
Yes, most basic residential installations are highly DIY-friendly. If you have a standard 24-volt HVAC system, basic hand tools, and the ability to follow safety instructions, you can safely replace the unit yourself.
How long does installation take?
A standard swap from one digital unit to another digital unit usually takes 20 to 30 minutes. If you are installing a smart device that requires a C-wire adapter or a complex Wi-Fi setup, expect the project to take about 45 to 60 minutes.
Do I need an electrician?
You only need an electrician if your home utilizes a line-voltage system (common with electric baseboard heaters), which uses 120V or 240V electricity. Standard central air systems use safe, 24-volt low-voltage wiring that does not require an electrician.
Can I install with 2 wires?
Yes, a 2-wire setup is very common for heat-only systems like boilers or gas fireplaces. You simply connect the red wire to the R terminal and the white wire to the W terminal, though you cannot use most Wi-Fi smart thermostats without adding a power adapter.
How much does it cost?
If you install it yourself, the labor cost is free. Hiring an HVAC professional for a standard installation typically costs between $100 and $150 but can exceed $250 if new wiring needs to be routed through your drywall.
Final Tips for Easy Installation
As we wrap up this guide, keep a few golden rules in mind to ensure a painless process.
Always turn off the power at the main breaker, not just the light switch next to the furnace. Your safety is paramount when handling any wiring.
Double-check your wiring against the photo you took in step three. Do not guess; if you are unsure, consult the manufacturer’s manual.
Finally, always use a compatible thermostat. Do not try to force a standard 24V smart thermostat onto a high-voltage baseboard heater without the proper heavy-duty relays.
Evidence-Based References
A Systematic Study for Smart Residential Thermostats
Temperature Sensing Optimization for Home Thermostat Retrofit
Exploring smart thermostat users’ schedule override behaviors and the energy consequences