
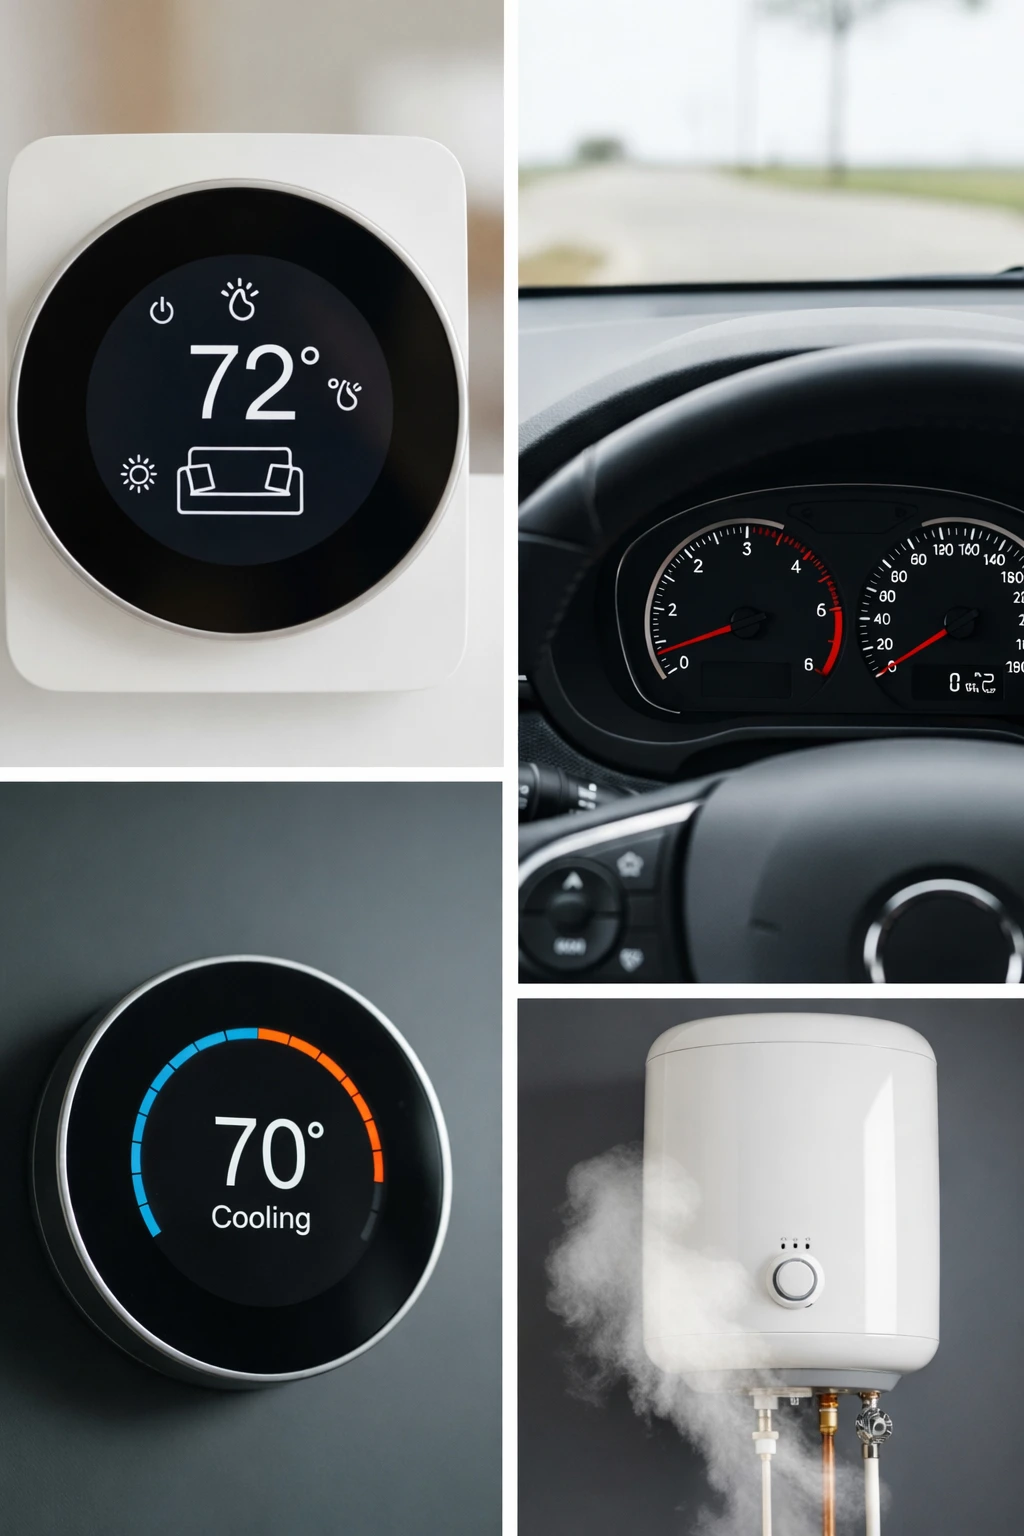
Replacing a thermostat might seem like a daunting task reserved only for seasoned professionals. However, with the right guidance, it is entirely possible to tackle this project on your own. Whether you are dealing with a drafty living room, an overheating engine, or a lukewarm morning shower, the thermostat is often the culprit.
In my years working alongside certified HVAC technicians and master mechanics, I have seen countless homeowners overpay for simple thermostat replacements. Learning how to change a thermostat can save you significant time and money.
This comprehensive guide will walk you through everything you need to know. We will cover the exact steps for replacing thermostats in your house, your vehicle, and your water heater. Let us dive into the details so you can regain control over your temperature settings safely and effectively.
What Does a Thermostat Do?
Before you break out the toolbox, it helps to understand exactly what a thermostat does. At its core, a thermostat is a temperature-activated switch. It constantly monitors the temperature of its surrounding environment.
When the temperature drops below or rises above your desired setting, the thermostat sends a signal. In a home, it tells your HVAC system to turn on the heating or air conditioning. It acts as the brain of your home’s climate control system.
In a vehicle, the thermostat regulates the flow of engine coolant. It stays closed when the engine is cold to help it warm up quickly, then opens to release coolant and prevent overheating. For a water heater, it ensures the water in the tank remains at a safe, consistent temperature for daily use.
Understanding what a thermostat is and why it is important helps you diagnose problems faster. Whether it is managing airflow, engine coolant, or hot water, this tiny device plays a massive role in your daily comfort and safety.
Signs You Need to Change a Thermostat
Recognizing the symptoms of a bad thermostat can prevent catastrophic system failures. Homeowners often ignore the early warning signs until their heating or cooling system completely shuts down.
If you are wondering what the symptoms of a bad thermostat are, start by checking your indoor air. In a home, the most obvious sign is an HVAC system that refuses to turn on or off. You might also notice incorrect temperature readings, where the room feels freezing but the digital display reads 72 degrees.
For vehicles, a faulty thermostat usually results in extreme temperature gauge readings. Your car might overheat after just a few miles of driving. Alternatively, the engine might never reach its optimal operating temperature, leading to poor heater performance in the cabin.
Water heater thermostats show their age through inconsistent water temperatures. If your shower starts scalding hot and turns freezing cold within minutes, the thermostat is likely failing. Ignoring these signs can lead to much larger, more expensive repairs down the line.
How Long Does It Take to Change a Thermostat?
Time expectations vary wildly depending on what exactly you are replacing. If you are preparing to change a thermostat in your house, block off about 30 to 60 minutes. This gives you plenty of time to read the instructions, label wires, and mount the new baseplate.
Automotive thermostats are more involved due to the location of the engine components. You should expect a car thermostat replacement to take anywhere from 1 to 3 hours. This accounts for the time needed to drain the coolant, remove the housing, and bleed the system afterward.
Water heater thermostats fall right in the middle of that spectrum. Safely draining a bit of water and navigating the electrical access panels takes about 1 to 2 hours. Rushing through any of these jobs is a recipe for disaster, so take your time.
Tools You Need Before Replacing a Thermostat
Gathering your tools beforehand is a critical step recommended by every service professional. There is nothing worse than having your HVAC system disassembled, only to realize you are missing a vital tool.
For almost all thermostat replacements, a small flathead or Phillips-head screwdriver is mandatory. You will use this to pry off faceplates and loosen tiny wire terminal screws. A power drill is optional but highly recommended if you need to install new wall anchors for a home baseplate.
A non-contact voltage tester is an absolute must for home and water heater projects. This ensures the power is completely off before you touch any bare wires. Finally, make sure you have the correct new thermostat out of its packaging and ready to go.
How to Change a Thermostat in a House
Replacing a house thermostat is one of the most rewarding DIY projects you can undertake. It immediately improves your home’s comfort and can noticeably decrease your monthly energy bills. If you want to know how to change a thermostat in your house safely, you must follow a strict, methodical process.
Working with HVAC wiring can be intimidating, but residential thermostat wires are low voltage (usually 24V). While they likely will not cause severe harm, crossing them while the power is live will blow the fuse on your furnace control board. This turns a cheap DIY project into an expensive service call.
To successfully replace an old thermostat, you need patience and good lighting. Having a smartphone handy to take reference photos is a trick I learned from veteran installers. It completely removes the guesswork when it is time to connect the new unit.
Step 1: Power Disconnection Process
Never assume that turning the thermostat to the “Off” position makes it safe. You must go to your main electrical panel and turn off the breaker connected to your furnace or air handler. Use your voltage tester near the thermostat wires to guarantee the power is fully disconnected.
Step 2: Old Thermostat Removal
Gently pull the faceplate of your old thermostat away from the wall. Most models snap off, but some might have small screws underneath. Once the faceplate is off, you will see the baseplate attached to the wall with several colorful wires connected to lettered terminals.
Step 3: Wire Labeling and Documentation
Before loosening a single screw, take a clear picture of the current wiring setup. Look at the letters on the terminals (like R, W, Y, G, C), not just the colors of the wires. Use the sticky labels provided with your new thermostat to tag each wire according to the terminal it is currently attached to.
Step 4: New Thermostat Installation
Unscrew the old baseplate and carefully slip the wires through the hole in the new baseplate. Mount the new baseplate to the wall, using a level to ensure it is straight. Attach the labeled wires to the corresponding terminals on the new unit, tightening the screws securely.
Step 5: Power Restoration and Testing
Snap the new thermostat faceplate onto the mounted baseplate. Head back to your breaker box and restore the power to the HVAC system. Test the system by turning on the heat and the AC, letting each run for at least five minutes to ensure proper operation.
Upgrading Old Thermostats to Digital Models
Replacing an old, mercury-based manual thermostat with a digital one is a massive upgrade. It completely changes how your home regulates temperature. However, it is important to weigh the benefits against the potential hurdles.
Thermostat Replacement for Electric Heat Systems
Electric baseboard heaters use line-voltage thermostats, which are entirely different from standard low-voltage HVAC systems. These run on 120V or 240V, which is enough electrical current to cause severe injury or death.
If you are changing a thermostat for electric heat, absolute caution is required. Double-check your breaker panel and use a multimeter to verify zero voltage before touching anything. If you are not completely confident in handling high-voltage electrical work, hire a licensed electrician.
Transitioning to a Smart Thermostat System
Setting up a smart thermostat brings your home’s climate control into the 21st century. After following the physical installation steps above, you will need to complete the digital setup.
Power on the device and follow the on-screen prompts to connect it to your home’s WiFi network. Next, download the corresponding manufacturer’s app to sync the device with your smartphone. Once synced, you can easily integrate the thermostat with voice assistants like Alexa or Google Assistant for hands-free control.
How to Change a Thermostat Battery
Sometimes, a completely dead thermostat does not need to be replaced; it just needs new power. Knowing how to change a thermostat battery is a basic homeowner maintenance skill. Most digital thermostats that do not have a dedicated C-wire rely on AA or AAA batteries to function.
General Battery Replacement Steps
Grip the outer edges of the thermostat faceplate and pull straight back toward you. The unit should detach from the wall-mounted baseplate. Locate the battery compartment on the back of the faceplate, remove the old batteries, and insert the new ones, ensuring the polarity is correct.
Honeywell Thermostat Battery Replacement
Honeywell is one of the most common brands found in homes today. To change batteries in a Honeywell thermostat, look for a small push-tab on the top or bottom of the casing. Pressing this tab allows the battery compartment to slide out easily, so you don’t even have to pull the unit off the wall.
Indicators of a Dead Battery
Your thermostat will usually warn you before it completely dies. Look for a flashing “Low Batt” or a battery icon on the digital screen. If the screen goes entirely blank and your AC or heat refuses to turn on, dead batteries are the most likely culprit.
How to Change a Thermostat in a Car

Your vehicle’s cooling system relies heavily on a properly functioning thermostat to prevent catastrophic engine failure. Learning how to change a car thermostat is an excellent way to dip your toes into automotive DIY. A stuck thermostat will either leave you freezing in the cabin or stranded on the side of the road with an overheating engine.
As a word of caution from professional mechanics: never attempt to change a car thermostat while the engine is hot. The cooling system is under extreme pressure. Opening a radiator cap or removing a hose on a hot engine can result in severe, disfiguring burns from spraying coolant.
The location of the thermostat varies wildly depending on the make and model of your vehicle. It is typically housed where the upper radiator hose meets the engine block. Having a repair manual specific to your vehicle will make locating and accessing the housing much easier.
Vehicle Cooling System Thermostat Replacement Process
Start by placing a large drain pan under the radiator petcock and draining enough coolant to drop the fluid level below the thermostat housing. Loosen the hose clamp and pull the upper radiator hose off the housing.
Next, use a socket wrench to remove the bolts securing the thermostat housing to the engine block. Lift off the housing and pull out the old thermostat, taking careful note of which direction the spring side is facing.
Clean the mounting surface thoroughly, insert the new thermostat (spring side facing the engine), and apply a new gasket. Reattach the housing, tighten the bolts to the proper torque specifications, and reattach the hose. Finally, refill the radiator with fresh coolant and bleed the air out of the system while the engine runs.
Vehicle-Specific Thermostat Replacement Summary
Thermostat locations and replacement procedures vary significantly depending on your vehicle’s make and engine layout. Here is a quick breakdown of what to expect for these specific models:
Top-Engine Access:
1999 Ford Ranger: Located at the top of the engine block via the upper radiator hose. It is an easy two-bolt job, but be careful not to crack the older aluminum housing by over-tightening.
2014 Chevy Silverado (5.3L V8): Found on the passenger side of the water pump. You must remove the air intake tube for clearance and purchase a combined thermostat/housing assembly.
Lower-Hose / Undercarriage Access:
2005 Chrysler 300 (2.7L V6): Located underneath the vehicle at the lower radiator hose. It is a messier job, and a full coolant flush is highly recommended.
2010 Honda Civic (1.8L): Accessed from underneath by removing the plastic splash shield. Honda cooling systems require extra patience to bleed out trapped air bubbles afterward.
2008 Dodge Nitro (3.7L V6): Positioned at the front lower hose connection. Drain the coolant first, and always ensure the thermostat’s jiggle valve is installed at the 12 o’clock position to help bleed air.
Tight-Space Vehicles:
Chevy Express Van: Vans have notoriously cramped engine bays. You will need to remove the interior “doghouse” (the engine cover inside the cabin) and use socket extensions to reach the housing bolts.
How to Change a Thermostat on a Water Heater
When your morning shower turns ice cold, learning how to change a thermostat on a water heater becomes a top priority. A standard electric water heater usually has two thermostats: an upper and a lower one. These work together to keep the tank evenly heated.
Replacing these components involves working in close proximity to both water and 240-volt electricity. This is a combination that demands absolute respect and strict safety protocols. If you do not feel comfortable working around high-voltage panels, it is best to call a professional plumber.
However, if you take the necessary precautions, this is a highly cost-effective repair. A replacement water heater thermostat costs a fraction of what a completely new tank would cost.
Electric Water Heater Replacement Steps
First, turn off the dedicated breaker for the water heater at your main electrical panel. Remove the metal access panels on the side of the tank and pull back the insulation. Use a non-contact voltage tester on the wires to guarantee the power is absolutely dead.
Disconnect the wires attached to the faulty thermostat, making sure to label them. The thermostat is held tightly against the tank by a metal spring clip; simply pry the clip back and slide the old unit out. Slide the new thermostat into the bracket, ensuring it sits flush against the metal tank, and reconnect the wires.
Immersion Heater Thermostat Replacement
Immersion heaters, often found in older homes or specific climates, require a slightly different approach. The thermostat in these units slides into a long pocket alongside the heating element inside the tank. You do not usually need to drain the water to replace the thermostat itself; just slide it out of the sleeve and insert the new one.
Electrical Safety Warnings
Water heaters run on high-voltage 240V circuits. A shock from this line can easily be fatal. Never bypass safety checks, never work on the system while the floor is wet, and always verify the power is off with a reliable multimeter or voltage tester before touching any terminals.
Pros & Cons of Water Heater Thermostat Replacement
Pros:
- Fixes hot water issues: Restores consistent, reliable hot water for daily use.
- Cost-effective repair: Prevents the need to prematurely replace an expensive water heater tank.
Cons:
- Electrical hazard: High voltage mixed with plumbing is inherently dangerous.
- Requires caution: One wrong move can result in a severe electrical shock.
How to Change Thermostat Temperature Settings
Sometimes, the issue isn’t a broken unit but simply incorrect settings. Knowing how to change thermostat temperature settings effectively can maximize your comfort. It is important to know the difference between manual adjustments and programming a digital system.
Digital System Settings
To adjust a digital thermostat, utilize the up and down arrows on the keypad or touchscreen. If you want to change the thermostat from Celsius to Fahrenheit, you usually need to enter the device’s setup menu. Hold down the “Menu” or “Settings” button for a few seconds until the advanced options appear, then scroll until you find the temperature scale toggle.
Manual Dial Adjustments
Older manual thermostats are incredibly straightforward. You simply rotate the outer dial or slide the lever to the desired number. Keep in mind that pushing the lever all the way up will not heat the room faster; it simply tells the furnace to run continuously until it reaches that extreme temperature.
How Much Does It Cost to Change a Thermostat?
Budgeting for this project depends heavily on whether you hire a professional or do it yourself. The cost of the thermostat unit itself also varies widely based on its features. Smart thermostats are significantly more expensive than basic non-programmable units.
Here is a quick breakdown of what you can expect to spend based on the type of repair and the route you choose.
| Type | DIY Cost | Professional Cost |
| Home Thermostat | $20–$250 | $150–$500 |
| Car Thermostat | $20–$100 | $200–$600 |
| Water Heater | $30–$150 | $150–$400 |
Thermostat Compatibility Guide
Before purchasing a new home thermostat, you must ensure it matches your current HVAC system. Buying an incompatible unit will lead to immense frustration during installation. The most critical factor for modern smart thermostats is the presence of a “C-wire” (common wire).
The C-wire provides continuous 24V power to the thermostat, which is necessary for bright WiFi displays. If you pull off your old thermostat and do not see a wire connected to the “C” terminal, many popular smart models will not work without an adapter kit.
If you are wondering what thermostat is compatible with Bryant, Honeywell, or Carrier systems, the answer is usually most universal thermostats. However, if you have a proprietary communicating system (often found in high-end, variable-speed HVAC units), you must stick with the manufacturer’s specific brand of thermostat to maintain full functionality.
Can I Replace My Thermostat Myself?
Yes, in most cases, you can absolutely replace your thermostat yourself. The vast majority of standard residential HVAC systems use color-coded, low-voltage wiring that is easy to manage. If you are organized, document your old wiring with a photo, and carefully read the manual, you will succeed.
However, your success depends on choosing a compatible replacement. If you are doing a simple swap of a basic battery-operated unit to another battery-operated unit, it is practically foolproof. The DIY route is highly encouraged for these basic scenarios.
When You Should NOT Replace a Thermostat Yourself
While DIY is great, there are distinct times when you should leave it to the professionals. Complex HVAC systems, such as dual-fuel heat pumps or systems with multiple multi-stage zoning dampers, require specialized wiring knowledge. One misplaced wire can cause the system to fight itself, resulting in catastrophic compressor failure.
You must also step back if you are dealing with line-voltage systems (like electric baseboards) and have no electrical experience. Finally, check your HVAC warranty. Some manufacturers will void the warranty on your expensive furnace or AC unit if an uncertified individual installs the thermostat.
Internal Linking Strategy
Note to webmasters: To build a strong pillar page, link this guide to your specific sub-articles. Connect mentions of smart home tech to your “Ultimate Guide to Smart Thermostats.” Link troubleshooting steps directly to your “Common HVAC Problems” page. Finally, connect the energy-saving benefits to your “Home Energy Efficiency Tips” cluster.
Frequently Asked Questions
Can I replace my thermostat myself?
Yes, replacing a basic residential thermostat is a highly accessible DIY project. As long as you turn off the power at the breaker and carefully label your low-voltage wires, it is safe and straightforward.
How long does it take to change a thermostat?
For a home HVAC thermostat, expect to spend between 30 and 60 minutes. “Additionally, replacing a car thermostat takes 1 to 3 hours, while a water heater thermostat replacement generally takes 1 to 2 hours.”
Is changing a thermostat easy?
It is relatively easy for standard home setups, requiring only a screwdriver and a smartphone for taking reference photos. Car and water heater thermostats require slightly more mechanical skill and strict adherence to safety protocols.
How much does it cost?
Doing it yourself costs between $20 and $250, depending entirely on the price of the new unit. Hiring a professional will add an additional $100 to $300 in labor fees on top of the hardware cost.
What are the signs of a bad thermostat?
In a home, signs include an HVAC system that won’t cycle on or off, or incorrect room temperature readings. For a car, look for an overheating engine or poor cabin heat, and for water heaters, look for wildly fluctuating water temperatures.
Conclusion — Should You Change Your Thermostat Yourself?
Deciding to change a thermostat yourself is an excellent way to take charge of your home maintenance. For most homeowners and DIY enthusiasts, it is a highly rewarding project. “Furthermore, it requires minimal tools, takes less than an hour for home systems, and saves a considerable amount of money on labor fees.”
If your current setup is outdated, now is the perfect time to upgrade to a smart thermostat. The energy savings alone will pay for the unit over time. Just remember to verify your wiring compatibility before making a purchase.
“However, always respect your limits. For instance, if you uncover complicated high-voltage wiring or if you are unsure about bleeding your car’s cooling system properly, there is no shame in calling a professional. Above all, safety and system integrity should always be your top priorities.”